
If you’ve met me in person any time in the last few years, you might have seen me whip out a little gadget and stare at it obsessively as various strange graphics appear on the screen. But that’s enough about my phone.
This is a post about a Do-It-Yourself air quality monitoring badge that I use when I’m out and about to help me understand what the air quality is like. If you would like to try making your own badge, there should be enough info here to get you started.
This is something like the fifth or sixth generation air quality monitoring badge that I’ve made in the years since COVID entered our lives. It’s also the one which (I hope) is least likely to result in an unexpected trip to the Special Room if you bring it through a border security check. No guarantees, though!
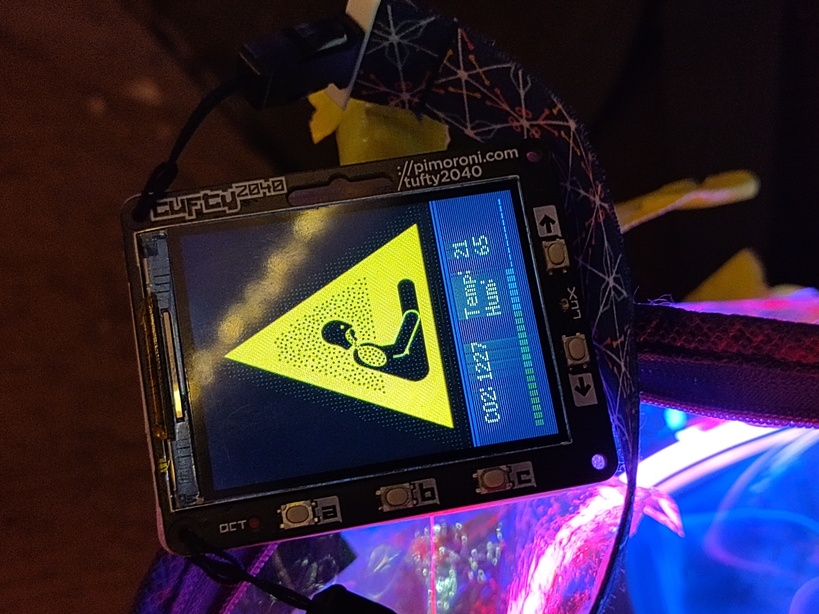
As you may have surmised I had decided to display some colour coded images to make it easier to tell at a glance what the air quality was like. Helpfully, Wikimedia Commons has a whole section of public domain ISO 7010 safety signs, like these:

Here are some action shots:
Incidentally, if you like would like a regular drip feed of international standard safety signs in your feed (and if we’re honest, who wouldn’t?), Sam from Hacks’R’Us has set up a lovely fediverse ISO 7010 safety signs bot.
Follow the ISO 7010 safety signs botSo how does an air quality monitor work? We’ll need a sensor, a microcontroller to read and process the sensor data, and some way to communicate to the user. Oh, and a power source, like a rechargeable battery or a USB cable with a power source to plug it into. For this device I was interested in monitoring CO₂ levels, which are a useful way to understand how well ventilated an indoor space is. Poorly ventilated spaces are statistically more likely to be sources of respiratory infections, so it’s good to be able to quickly check. Other sensors are available for things like particulates (PM2.5 and PM10) and volatile organic compounds (VOCs).
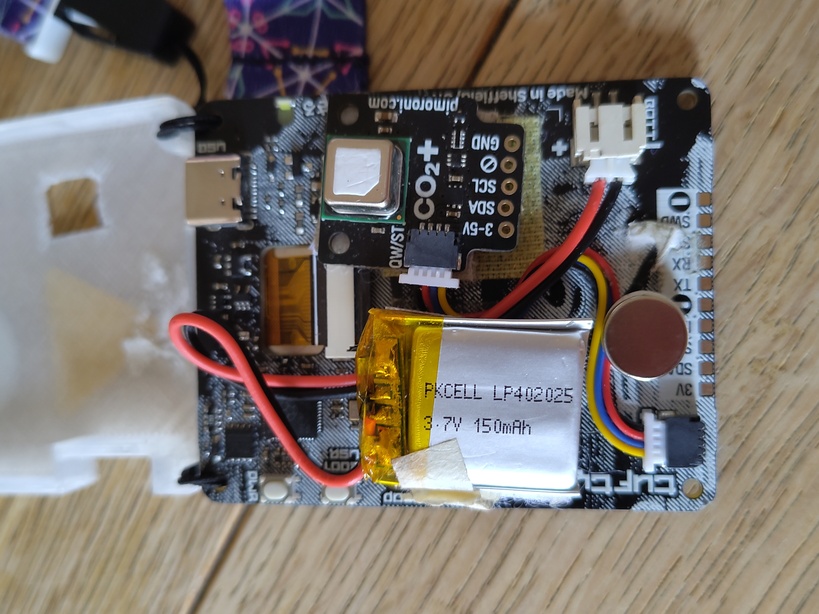
There are two sorts of CO₂ sensor - some of them estimate the CO₂ levels, and some are “true CO₂ sensors” which claim a much higher degree of accuracy. I used a version of the Sensirion SCD41 true CO₂ sensor which comes with a STEMMA QT / Qwiic connector, made by Pimoroni, Sheffield’s Primary Provider for Piratical Projects. To keep things simple I plugged the sensor into Pimoroni’s Tufty2040 badge, which handily combines a Raspberry Pi 2040 microcontroller with a screen, buttons and STEMMA/Qwiic connector:
If you wanted to make one of these yourself, you’d need:
- Pimoroni Tufty 2040 badge
- Pimoroni Sensirion SCD41 sensor breakout
- JST-SH to JST-SH cable to connect the sensor to the badge
- Battery with JST-PH connector
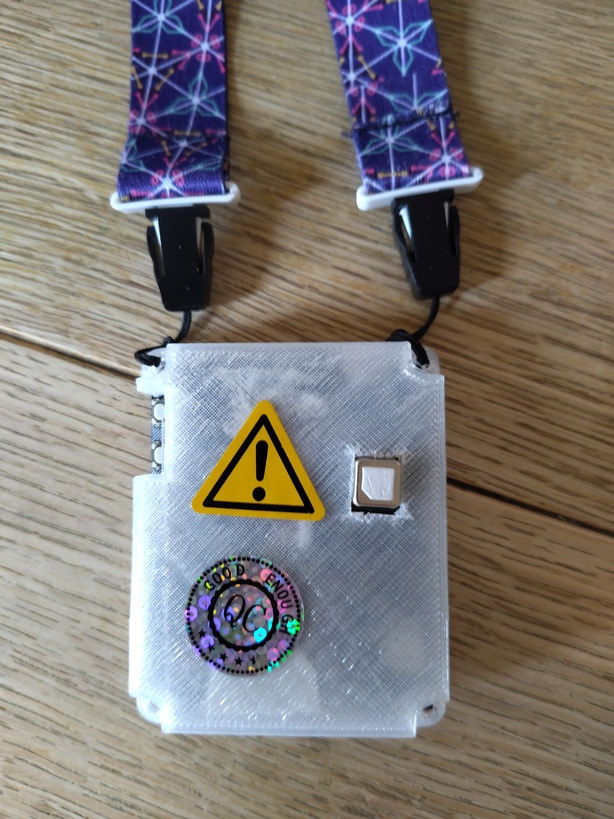
- Optional quality control sticker, magnets, back plate etc
Be aware that the Tufty 2040 doesn’t have Wifi, Bluetooth or an SD card, so your options are limited if you wanted to save, upload or further process the sensor readings. Other boards are also available :-)
My memory is hazy about the 3D printed backplate, but I think I adapted a model created by Henrique Salvador to make it a bit thinner. There are quite a few printable cases for the Tufty 2040 out there on teh interwebs, if this one doesn’t quite work for you.
And here’s my hacky Python script to read the sensor data output the readings and choose which image to display. It also incorporates a little animated bar graph widget which I found somewhere in the Tuftyverse. As ever, this is not intended to be correct or complete, and I’m confident there are a myriad of ways it could be done better, simpler etc…
from picographics import PicoGraphics, DISPLAY_TUFTY_2040, PEN_RGB332
import time, math, random, gc
from pimoroni import BREAKOUT_GARDEN_I2C_PINS
import breakout_scd41
from pimoroni_i2c import PimoroniI2C
import jpegdec
import gc
i2c = PimoroniI2C(**BREAKOUT_GARDEN_I2C_PINS)
breakout_scd41.init(i2c)
breakout_scd41.start()
display = PicoGraphics(display=DISPLAY_TUFTY_2040,rotate=90)
jpg = jpegdec.JPEG(display)
BACKLIGHT = 0.5
display.set_backlight(BACKLIGHT)
WIDTH, HEIGHT = display.get_bounds()
WHITE = display.create_pen(255, 255, 255)
BLACK = display.create_pen(0, 0, 0)
YELLOW = 8
ORANGE = 9
RED = 10
MAGENTA = 11
VIOLET = 12
BLUE = 13
CYAN = 14
GREEN = 15
def bargraph(ox, oy, w, h, value, colors, pips=32):
step = int(pips / len(colors))
filled = int(value * pips)
pip_width = int(w / pips)
for i in range(pips):
p = colors[int(i / step)]
display.set_pen(p)
x = i * pip_width
if i > filled:
display.rectangle(ox + x, oy + h - 1, pip_width - 2, 1)
else:
display.rectangle(ox + x, oy, pip_width - 2, h)
co2 = temperature = humidity = 0
while True:
t = time.ticks_ms() / 1000.0
display.set_pen(display.create_pen(50, 50, 70))
display.clear()
TEXT_COLOUR = WHITE
filename = old_filename = "ISO_7010_E068.jpg"
jpg.open_file("ISO_7010_E068.jpg")
jpg.decode(0,0)
display.set_font("bitmap8")
display.set_pen(TEXT_COLOUR)
if breakout_scd41.ready():
print("sensor ready")
try:
co2, temperature, humidity = breakout_scd41.measure()
except:
print("sensor error - skipping")
display.text("CO2:", 20, 255, 22)
display.text(str(int(co2)), 60, 255, 22)
display.text("Temp:", 120, 255, 18)
display.text(str(int(temperature)), 180, 255, 18)
display.text("Hum:", 120, 275, 18)
display.text(str(int(humidity)), 180, 275, 18)
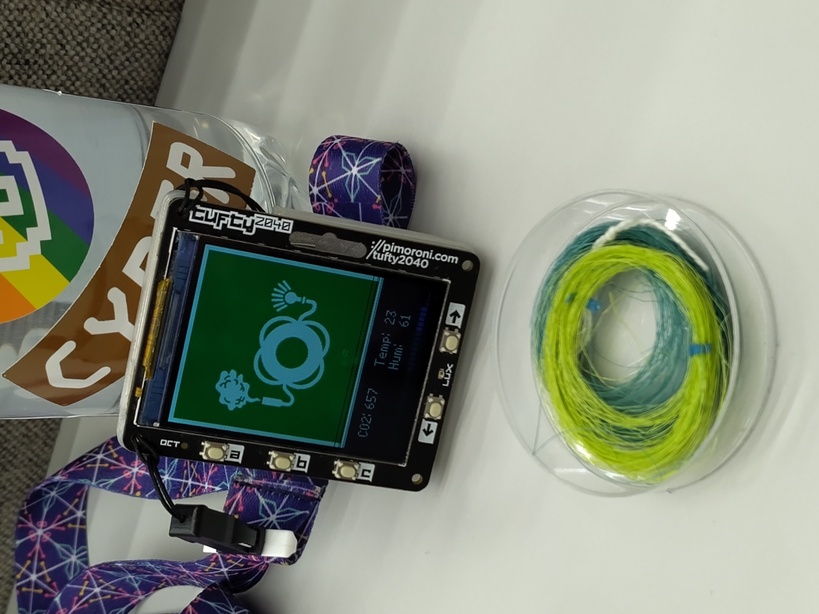
if co2 <= 400:
filename = "ISO_7010_E068.jpg"
print("co2: %d ppm - let's be honest, you're probably outside right now!" % (co2))
elif co2 > 400 and co2 <= 800:
filename = "ISO_7010_E068.jpg"
print("co2: %d ppm - good for a well ventilated indoor space" % (co2))
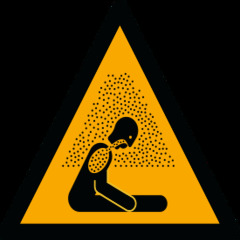
elif co2 > 800 and co2 <= 1500:
filename = "ISO_7010_W041s.jpg"
print("co2: %d ppm - poor air quality, need to get some ventilation" % (co2))
else:
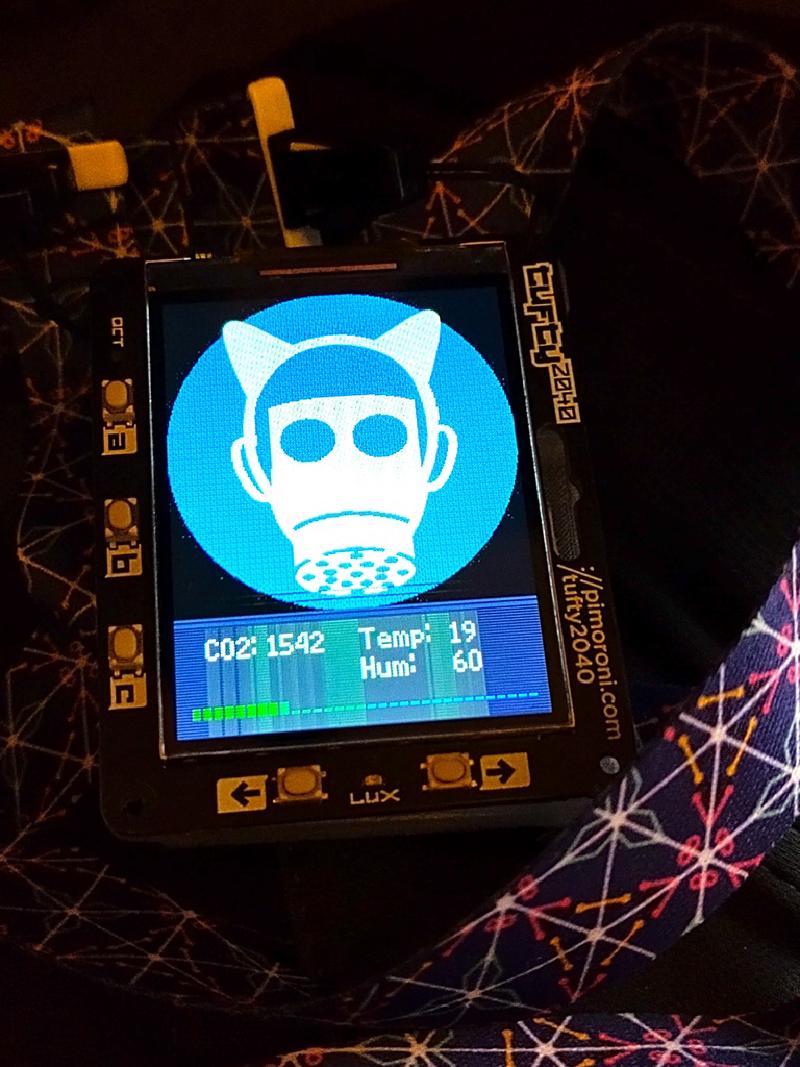
filename = "ISO_7010_M017_cat.jpg"
print("co2: %d ppm - danger level, N95 mask recommended (cat ears optional)" % (co2))
if filename != old_filename:
jpg.open_file(filename)
jpg.decode(0,0)
old_filename = filename
print("changed image")
print("updated")
for v3 in range(1,30):
bargraph(10, 300, 230, 8, (v3/30), [VIOLET, BLUE, CYAN, GREEN])
display.update()
time.sleep(1)
display.set_pen(BLACK)
display.rectangle(10, 300, 230, 8)
display.set_pen(WHITE)
gc.collect()And if you got this far and are still wondering about Lüften, this is the German practice of airing out rooms by opening all the windows for a short time. Yes, of course the Germans have a word for it! See also Querlüften (cross-ventilation) and my personal favourite: Stoßlüften - shock ventilation.
So basically: Katzenohren? ⇒ Stoßlüften!